As the Persephone Period from November to February wanes and the sun returns, many gardeners don’t want to wait until spring to begin the growing season. Fortunately, with a little extra protection and enough heat to ward off Jack Frost, it’s possible to grow greens and other cool season crops long before the garden soil warms.
A winter cold frame is the basic design of a standard cold frame but with insulated sidewalls and some sort of heat source. For those who wish to be precise, it’s technically a hotbed. Instead of using a heating cable running through the soil or adding fresh manure to create enough warmth to bump up the temperature inside, a single light bulb does the trick.
Winter cold frame construction guidelines
The key to a winter growing environment is keeping the cold at bay. That can be done by constructing a box that is impervious to the elements.
2 x 2 inch lumber is adequate for the frame, although 2 x 6 inch is best for those who prefer a beefier structure that won’t be easily moved. Use 1/4 inch plywood for the skin on both the inside and out. The exact dimensions of the cold frame itself depends more upon your personal preference and how much you want to grow.
Build the walls using 1/4 inch plywood. Line it with 1 1/2 – 2 inch wide rigid foam insulation. That will keep it snug no matter what cold the winter throws at you. Basically, you’re creating a sandwich with plywood and foam insulation. To prevent moisture from finding its way to the center, apply a bead of caulk along the edge before screwing down each of the pieces of plywood.
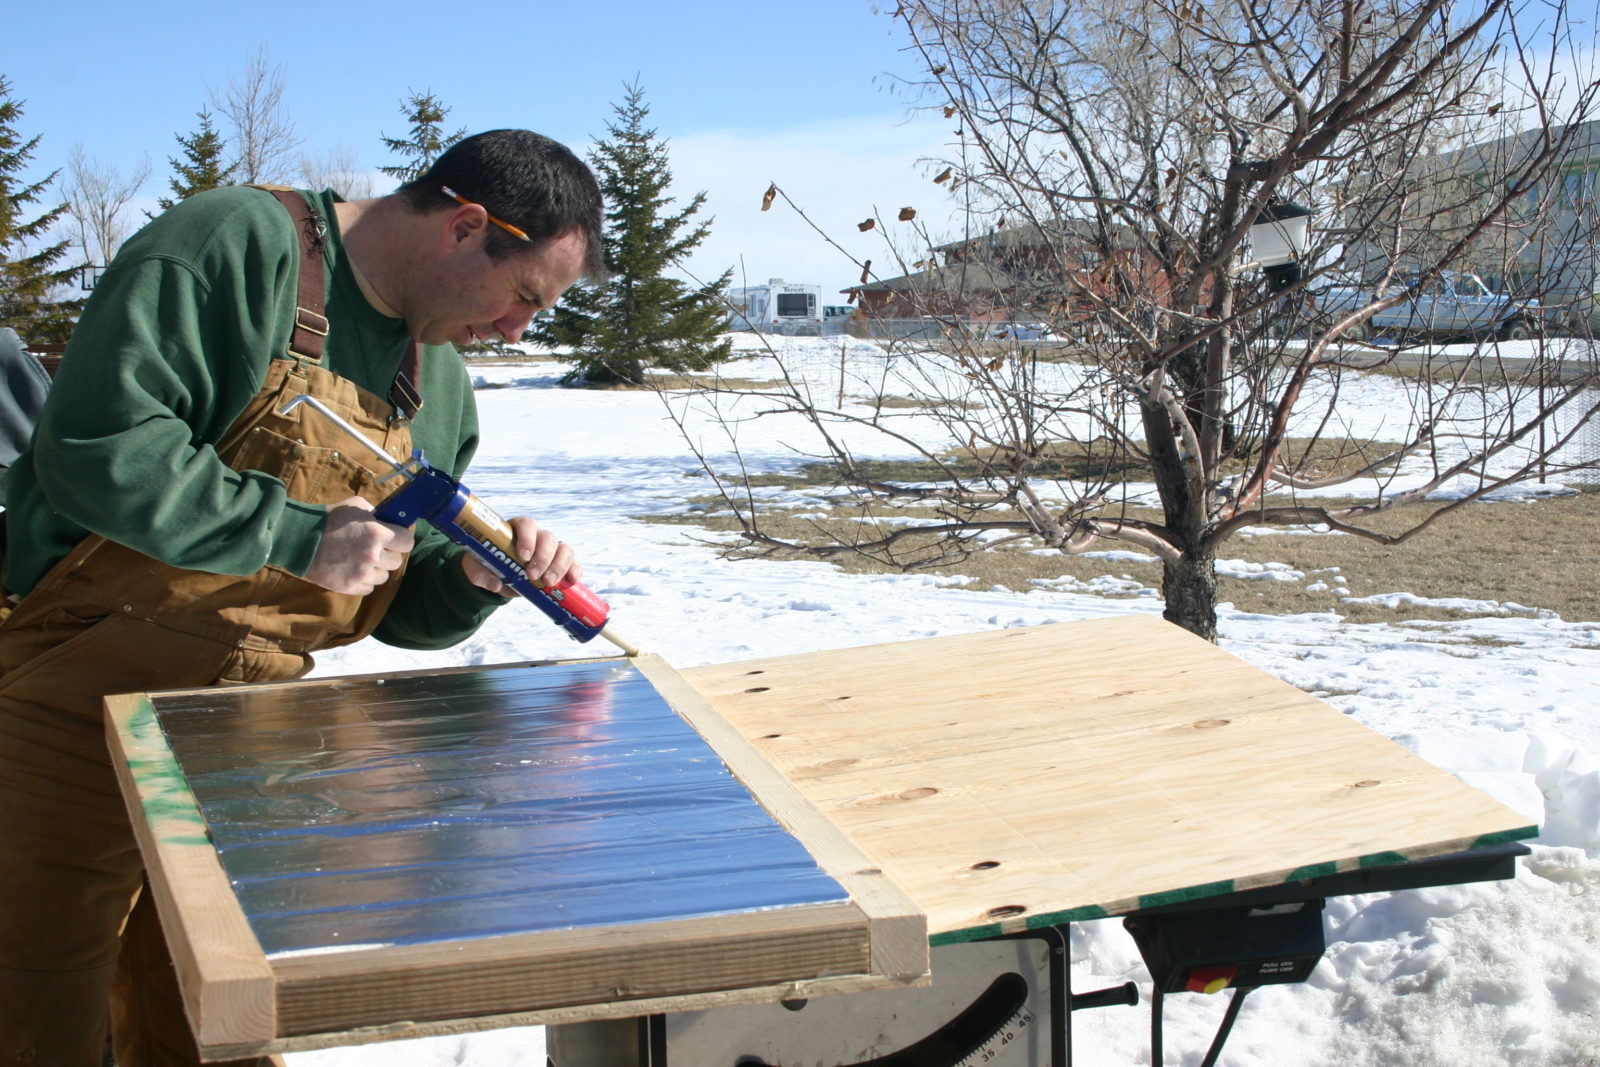
Use liquid nails or construction adhesive before fixing screws – photo by Amy Grisak
A good size for a winter cold frame
When determining size, follow common sense guidelines. Make sure it is not so big that you can’t reach to the back of it without falling inside. I recommend a cold frame size of 3 feet by 8 feet. That’s bigger than you might think. Even at that, you’ll need several hands to move one that size into place.
The other consideration is the height of the box. Plan on having a front wall that’s at least a foot above the ground. It works best if at least 6 inches of the box are buried below the soil line. That means the front wall should be 18 inches tall. If you wish to bury it deeper, make it taller.
For maximum solar efficiency, it’s a good idea to create an angle to the lid. This allows the cold frame to capture more of the precious rays, particularly in the late winter and early spring. To create this natural slope, the back of the box needs to be taller than the front. If the front is a 18 inches high, shoot for around 24 inches in the back. The angle doesn’t have to be severe. Just enough to best utilize the ever-increasing sunshine while giving the plants ample growing space.
Related Featured Articles

Related Videos

Related Blogs
Here’s more information about gardening that you’re going to want

Watch a Gardening Video

Learn About Osmocote Products

Read a Gardening Blog