Make Your Own Rustic Pot
Views: 2995
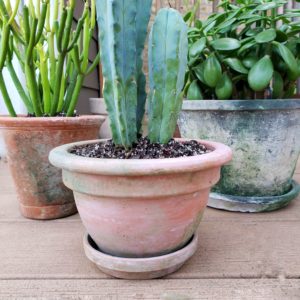
My city neighborhood looks beautiful right now. Weathered pottery with flowers and lush greens sit on almost every stairway or balcony. A whole season of summer created the perfect mossy and chalky coating on planters. Usually the best looking rustic pots develop from several seasons of neglect. An owner will often store them outside and forget about them while they grow mold, calcification, and antique charm. I don’t have a stash of age-old terracotta sitting in my yard, but I wanted that beautiful vintage look. YouTubers and bloggers offer a variety of do-it-yourself techniques, so I researched them and chose the easiest method. I learned that pot painting is fun! All you need is a few simple tools: a basic terracotta pot, acrylic paint, and a sponge. Here’s how to make your own rustic pot.
The Basic Supplies
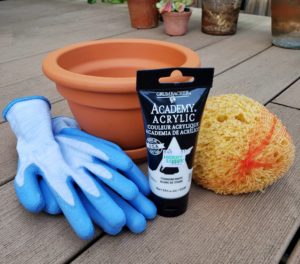
Basic terracotta pots are easy to find. Garden centers, craft stores, and even thrift stores carry stacks of standard terracotta pots. If you find terracotta pots with unique shapes or sizes – even better. I chose one with an extra border and more rounded shape than the standard pots. Once you have your pot, you will need acrylic paint. This is easy to find at your local craft or art store, and is sold in tubes or small jars. I found acrylic paints at Michaels for .99 each. Choose white for the all-over base and a mossy green color for added effect. Sponge and small plastic container for mixing paint with water. You may also want to use gloves and a drop cloth to keep your surface clean.
You Can’t Get It Wrong
The best projects are ones that you can’t get wrong. This method is a breeze because it doesn’t require any precision. Take a dollop of the white acrylic paint and place it in your mixing container. Add a few teaspoons of water and mix the solution. If it looks too clear just add more paint. Cut the sponge in half so you can use one piece for the white paint and one for the green. Use your gloves and dab the sponge into the solution and wipe it on your pot. The terracotta pot will absorb some of the paint, so you may have to repeat a few times. Natural calcification rarely develops evenly, so swirl and dab in an uneven pattern. Now, blot the green paint on the bottom of the pot where moss usually forms. Set it aside to dry for a day, then decide if you want to add more color.

Tips On Color
Moss usually grows closer to the bottom of the pot or around rims, so use more green in these areas. For the chalky look, I recommend using tan or taupe color. This creates a slightly muted effect, as opposed to a bright white. Both colors work, but the bright white creates a peach finish, where the taupe or tan looks more muted and natural. Once I realized how quick and fun this was I chose a few more of my rustic pots and enhanced them using the same technique. I really lost myself in this fun and relaxing painting project, and would recommend it to anyone. The process is enjoyable, and you will have “weathered” pots without the wait.
Meet Paula Palma
Paula has a teaching background in pilates, yoga, and meditation. She is currently studying biology as a prerequisite for further education. One of her favorite…
Paula's Recent Posts
What To Do When You Inherit A Houseplant

Prevent Fungus Gnats – Three Easy Methods
Membership Has Its Perks

- Ask The Expert Questions
- Newsletter Archive
- PlantersPlace Magazine
- Members Photo Gallery
- Product Ratings & Reviews
- Garden Club Samples
Here’s more information about gardening that you’re going to want!

Watch a Gardening Video

Learn About Osmocote Products

Read a Gardening Blog