Repotting Orchids for Great Blooms
Views: 547

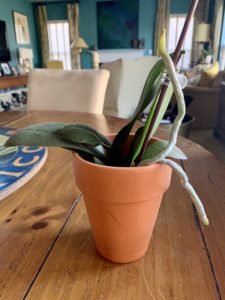
I am an orchid lover who recommends repotting orchids for great blooms. I’m not an expert by any stretch of the imagination, but I try. I am often asked by friends about replanting them. Because they are such delicate beauties and known to be finicky, it is easy to be intimidated by the idea of replanting. Here is an easy guide to help.
Repotting orchids for great blooms: begins with knowing WHEN to repot them.
There are a few rules questions to ask yourself when repotting orchids. First, when was the last time the plant was repotted? Like any plant, orchids pull vital nutrients from the “soil” (in this case, a crumbly bark mix) they are planted in. Over time, the soil breaks down and not only stops being a good source of nutrients but also compacts round the roots. Compacting around the roots deprives the plant of air space in the pot that orchids require. If that’s happened, planting mix needs to be replaced. Annually is a good rule of thumb.
Next, ask yourself if the plant seem crowded? Orchids do like a snug fit, but if the roots begin pushing out of the pot, they are looking for air. That is a sure sign that it’s time to repot.
Finally, is your orchid new? Often times when orchids are gifted from a florist or purchased, they come gussied up with a pretty layer of moss on top. This holds in water, which is actually terrible for orchids and causes the bark planting mix to break down much more quickly. The moss should be removed and the orchid likely will need to be replanted.
Supplies Needed
You actually don’t need much when repotting orchids for great blooms. Here’s a list of the basics:
- Fresh chunky bark mix. You can visit an orchid nursery to pick this up or purchase one online. I like Better-Go Orchid Mix. Do be aware of the type of orchid you have. I only have Phalaenopsis orchids and the mix I use suits them.
- Scissors for trimming roots, leaves and stems. I use Bonsai scissors, but there are some great snips made for orchid care if you are in the market. I love these from Burgon & Ball. Whatever you select, make sure they are nice and sharp: a clean cut is essential for healthy regrowth.
- Gloves. To protect your hands. Sometimes the planting medium has splinters!
- A pot. Select one that is just one size up from the existing pot. Remember, orchids like a snug fit.
- A wooden spoon (just the handle part will be needed) or a dowel rod to help work the planting medium around the roots.
Repotting Orchids for Great Blooms: Step By Step
Removing the orchid from the existing pot can be the hardest part or repotting orchids. The roots are often bound in the pot tightly. If you have an orchid with a soft plastic pot, try massaging the pot a bit to loosen it. If not, you may have to run a dull knife around the inner rim of the pot to free your plant. Invert the pot and tap gently on the bottom to release it.
Next, examine the Roots. If they feel dry and stiff, soak the roots in water for a few minutes until they soften. Once they are pliable, GENTLY untangle the roots. Now is the time to trim away any that are soggy or black. Any that you notice are hollow can be eliminated, too. Once your trimming is complete, give the roots another rinse.
Then, you will ease your orchid into its new pot. Be sure to hold the plant gently and upright as you pour new bark mix around it. Using the end of a wooden spoon or dowel, carefully work the bark bits down around the roots. Once this is complete and the plant is firmly in place, water generously.
By repotting orchids each spring, you set them up for success. And gorgeous blooms.
Meet Elizabeth Morse
I specialize in creating productive gardens for my clients (garden consults), showing them how to use fresh foods (private chef & cooking classes) and enjoying…
Elizabeth's Recent Posts

Best Garden Planning Software and Apps


