DIY Mushroom Logs Part 2: Log Inoculation
Views: 5759
Now that I’ve convinced you—and myself!—that growing your own mushrooms on a log is the thing to do, and also explained the details about Phase 1 of DIY mushroom growing—Substrate Acquisition—it’s time to put down the chainsaw and pick up the power drill for Phase 2.
Supplies
Log inoculation is the goal of DIY mushroom log cultivation, and certainly the most labor intensive. I may have jumped straight into the power drill phase a little too early though. Prior to drilling, you’ll have to purchase a few supplies:
- Drill bits – either 8.5 mm or 12 mm
- Log inoculation tool
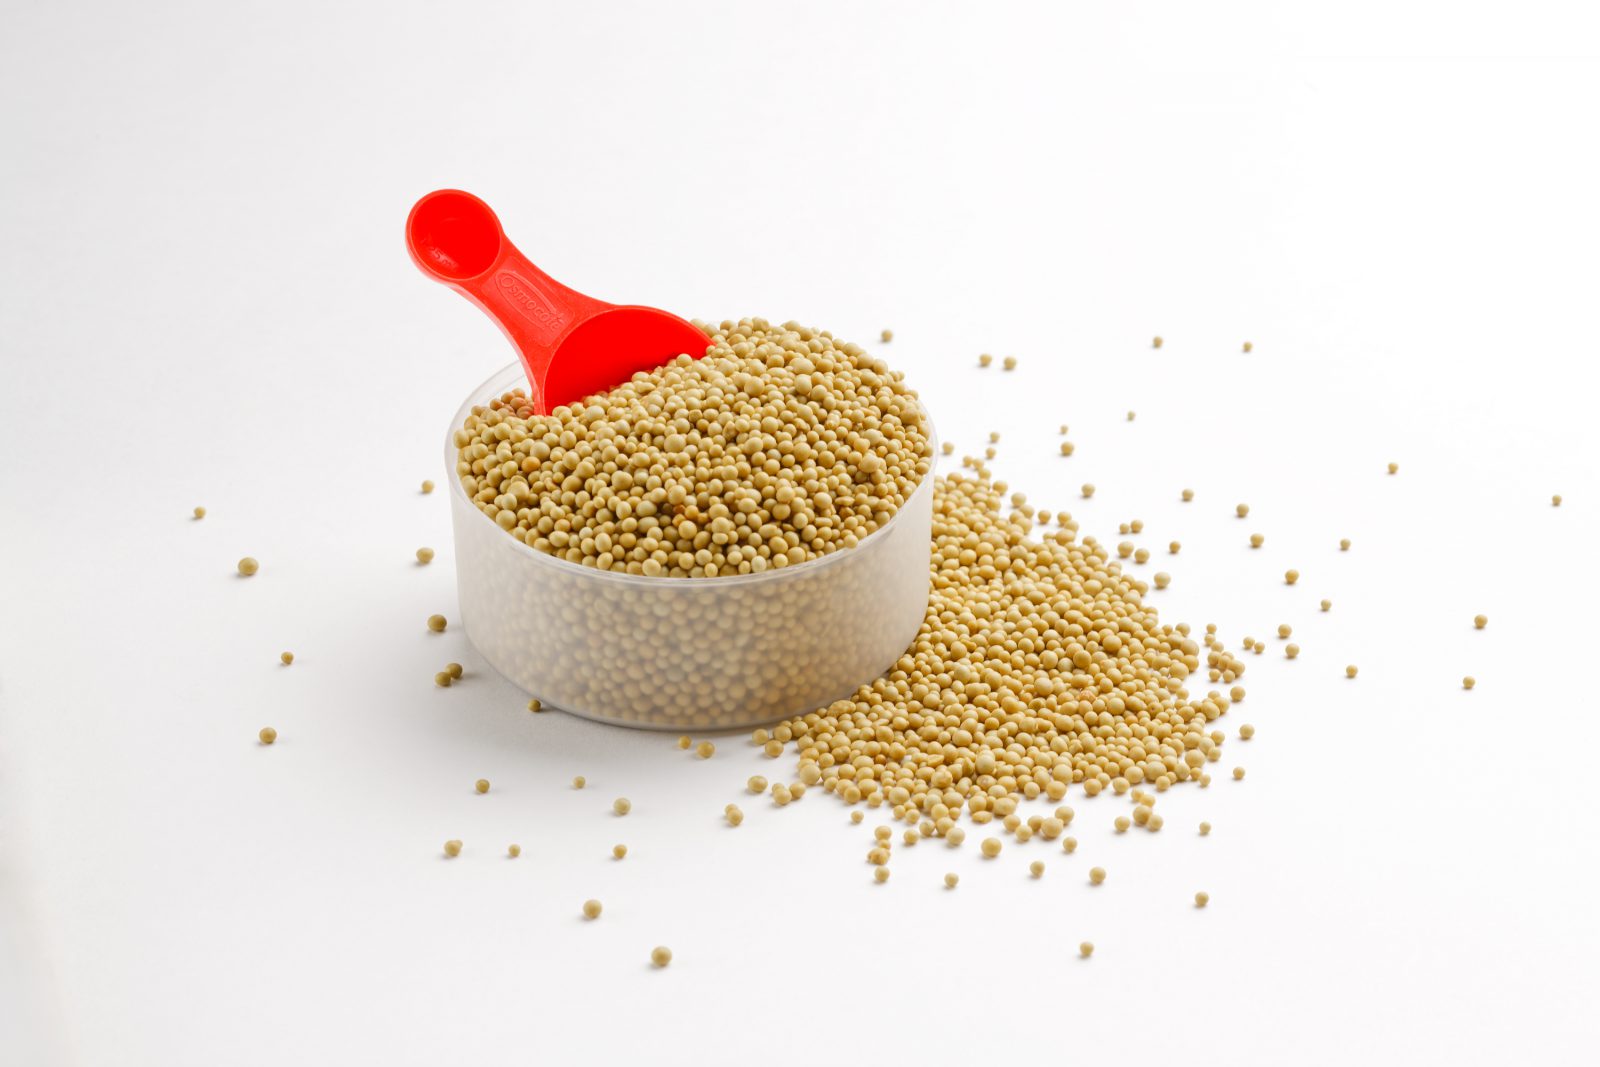
- Mushroom spawn
- Food-grade wax, jam jar wax or beeswax
- Wax daubers
The mushrooms you choose to grow are up to you. In the class I attended our instructor said that shiitake is the best choice for beginning log growers. Mushroom spawn come in two forms: Combined with loose sawdust in a bag, and also as compacted sawdust in a plug form. You can gather all of these supplies at an online specialty retailer such as North Spore or Field and Forest. Keep in mind that the drill bits you need depend on the type of spawn you purchase: plugs require an 8.5mm bit whereas the sawdust form requires a 12mm bit.
Drill and Bits
You inoculate logs with mushroom spawn by drilling holes into a log. I mentioned a power drill earlier. You may already have a handheld power drill with bits. It’ll do the job. However, drilling the holes with an angle grinder fitted with a drill bit adapter makes the drilling proceed not just a lot faster but with more uniform results. The angle grinder’s side-positioned handle lets you use both hands for drilling with better control. And the special log inoculation drill bits have a stop collar—this ensures the hole you drill is only so deep—about 1 1/8-inch deep—resulting in uniform holes. Having holes of a certain depth is important so that the sawdust or plugs inserted into them don’t end up with air space at the bottom. This space can dry out the log and sawdust and impact mushroom growth. Here’s a VIDEO of the hole drilling process.
Space your holes 4-6 inches apart in rows—one row for every inch in log diameter. Use a diamond-shaped pattern for rows. My instructor makes his logs a bit denser than that, but as a beginner I would stick with the 4-6 inches. Use the hole log, going all the way around it.
Mushroom Log Inoculation Tools
Use a log inoculation tool for sawdust spawn. It essentially creates a spawn plug in its cylinder, and releasing the device into the hole “punches” the spawn into the hole. The volume of the cylinder is the same as the hole, hence why you need to use the 12mm drill bit that corresponds to the inoculation tool volume.
If you are using the spawn plugs, you’ll simply tap the plugs into the holes. Again, the plug should fit right into the hole, hence why need to use the 8.5mm drill bit so the plug fits the hole.
Sealing the Inoculation Sites
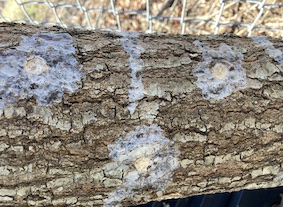
Our class instructor drilled into us (no pun intended) the importance of moisture management. Logs must not dry out, and most importantly the inoculation sites must not dry out. The inoculated holes need to be sealed with wax to help keep the sawdust and spawn from drying out. Heat the wax while you’re drilling and inoculating your logs. When you see “smoke” just begin to rise it’s warm enough. Use a wax dauber to cover and seal the holes.
That covers Phase 2 of DIY mushroom log growing. Phase 3 is the “hurry up and wait” period. I’ll discuss that in greater detail in the next installment.
Meet Ellen Wells
When you’re raised on a farm, you can’t help but know a thing or two about gardening. Ellen Wells is our expert on edible gardening.…
Ellen's Recent Posts
Rati-Tail Radish Review
Grow Fava Beans and Improve Your Soil
Membership Has Its Perks

- Ask The Expert Questions
- Newsletter Archive
- PlantersPlace Magazine
- Members Photo Gallery
- Product Ratings & Reviews
- Garden Club Samples
More information about edible gardening that you’re going to want

Edible Gardening Videos

Edible Gardening Podcasts

Got a Edible Gardening Question?