Fall Care for Sunchokes
Views: 1504

Maybe you’ve eaten sunchokes, a.k.a. Jerusalem artichokes, at a restaurant or have seen them as a surprise ingredient on one of the televised cooking competitions. Maybe their nuttiness intrigued you enough to consider growing it yourself. Great! Early fall is a great time to plant these USDA Zones 3-9 perennial vegetables. We’ll cover the hows of that below. And if you are already growing them, we’ll give you some fall maintenance and overwintering tips so your sunchoke patch is primed to thrive again next spring.
Planting Sunchokes in Fall
If you’re just starting a sunchoke patch, fall is a great time to plant them before the ground freezes. Choose a sunny spot with loose, well-draining soil, and plant your tubers about 3–5 in. deep and 12–18 in. apart. Cover with soil. In colder Zones, a thick layer of mulch (shredded leaves or straw, for example) will insulate them through the winter. Give them a bit of water and they will be set for the winter.
For those of you with an already-established stand of sunchokes, properly putting them to bed for the winter will give them a restful “sleep” for the winter. And, like you when you get a great night’s sleep, your sunchoke’s cozy winter’s rest will have them emerging from the ground and ready to go early next spring. Here are a few tips to put them to bed properly.
Cut Back Sunchoke Stems
Your sunchokes will not survive beyond a hard frost. Once that frost has come, trim them all back to just a few inches above the soil. Removing most of the above-ground biomass will not only tidy up your garden, but it will also remove dead stems where pests overwinter. And with all the stems and leaves gone, you will have an easier time covering your sunchoke patch with mulch (more on that step in a minute).
Harvest Your Tubers—Or Don’t
That’s a suspicious statement, isn’t it? To harvest or not to harvest. Yes, you can harvest some this season. That’s really why you grow them—to enjoy! Once the tops die back and you’ve cut away the aboveground portions, you can harvest some for eating. Just dig them out of the ground now, or wait until they’ve experienced a few frosts—they are a tad sweeter after some cold weather.
Harvesting can help you control the spread of your sunchokes. It’s a crop that can spread easily, and they can creep into other sections of your garden if left unchecked. Harvesting is a good (and tasty) way to thin out your patch. But don’t harvest them all, obviously. You’ll want plenty of sunchoke tubers in the ground to sprout into your new crop for next year.
Mulch
As I said above, adding some mulch will help protect the tubers over the long winter. A 3-6 in. layer of straw, shredded leaves or compost will insulate the soil and protect the tubers from the cycle of freezing and thawing soil. Mulch also helps conserve soil moisture, so it’s recommended (but not totally necessary) even for places that don’t become super cold over the winter.
What the mulch and nature’s own ideal cold storage technique (the soil itself) allow you to do is head out to your sunchoke patch in midwinter to sneak a few tubers when the sunchoke craving hits. These protective measures keep those tubers in excellent condition for eating through the winter season. Again, remember to save some for next year’s growth.
A few simple gardening tasks completed in just a few minutes and your sunchoke patch is set up for success in spring. They basically take care of themselves—and you benefit with some delectable morsels for dinner.
Meet Ellen Wells
When you’re raised on a farm, you can’t help but know a thing or two about gardening. Ellen Wells is our expert on edible gardening.…
Ellen's Recent Posts
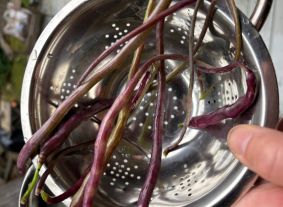
Rati-Tail Radish Review
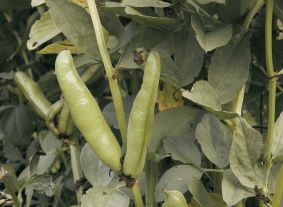
Grow Fava Beans and Improve Your Soil
Membership Has Its Perks

- Ask The Expert Questions
- Newsletter Archive
- PlantersPlace Magazine
- Members Photo Gallery
- Product Ratings & Reviews
- Garden Club Samples
More information about edible gardening that you’re going to want

Edible Gardening Videos

Edible Gardening Podcasts

Got a Edible Gardening Question?