Grow Fresh Greens Indoors This Winter
By Nina Koziol
You don’t need to have ‘the gardening gene’ to grow fresh greens indoors this winter. Really!
At this time of year, the sunlight is still weak and the skies are often somber. Spring seems a long way off. That’s all the more reason to have a little fun harvesting edibles that are grown indoors. How about a fresh crop of lettuce, spinach, herbs or teeny-tiny greens, called microgreens, growing on your kitchen counter or a sunny windowsill?
Why Not Start with Microgreens?
Microgreens are the nutrient-rich wonder-foods coveted by foodies. Essentially, they are the newly sprouted leaves from seed-bearing plants. They’re larger than sprouts but smaller than “baby” salad greens. Microgreens are popular as a garnish on fruit, cooked potatoes, salads, egg dishes and soups, and inside of wraps, gratins, stuffings and frittatas. You don’t need a green thumb or even a garden to grow them.
Leafy Greens Are Another Good Choice
All the edibles that like cool temperatures outdoors do very well indoors, given the right location. Examples are leaf lettuce, arugula, kale and spinach. A window that faces south or west or a “grow” light will do. I use windowsills and a few fluorescent lights purchased at the big box store. The ideal location is away from heat (radiators or vents) and away from cold drafts and curious pets. Don’t have the right spot? Try using LED or other cool lights under a kitchen cabinet and place the plants 3 to 4 inches below the lights. Turn the lights on for about 12 hours a day.
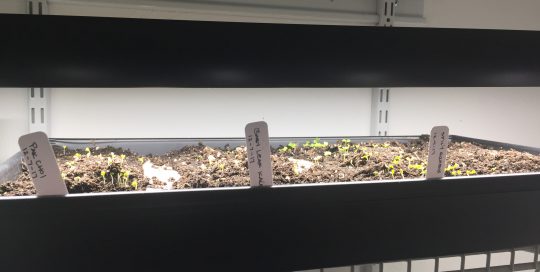
If you don’t have a sunny window for growing herbs or leafy greens, consider growing them on your kitchen counter. Place LED lights under a cabinet and leave them on for 12 to 14 hours a day. Plants grow best when the top leaves are about 3 inches from the lights. Photo by Nina Koziol
How to Select an Indoor Container
Just about any sort of pot and container can be used for growing plants indoors. Try using a flat, shallow container as long as it has drainage holes and a tray below to catch water. Garden centers sell inexpensive seed-starting flats for this purpose. You can also use wide plastic pots that are 4” to 6” tall. If I run out of pots, I recycle large yogurt and cottage cheese containers. After a thorough cleaning, poke a few small holes in the bottom of each one for drainage. Because many of the indoor edibles such as lettuce have shallow roots, you don’t need a deep or expensive container.
What to Look for in a Potting Soil
‘Seed starting’ mix or soil-less potting mix can be purchased at the local garden center. After opening the bag, add a cup or two of water to moisten the mix. Next, scoop it into the pots and tamp it down before sowing seeds. While it may be tempting, garden soil is not suitable for indoor gardening. It’s too heavy for seed starting purposes and may contain organisms that affect seedlings. Soil-less seed starting or potting mixes contain no soil. They are typically made of peat moss, ground bark and other organic ingredients.
Growing Indoors with Seeds
Most seeds started indoors are small. Seeds of lettuce, for example, are only 1/16th inch long. When you are ready to plant, place them on top of the moistened potting mix, and press then down. You want them to be barely covered. If placed too deep, seeds may rot.
To keep the seeds moist, cover with plastic wrap and use a spray bottle to keep the soil surface damp. When using a seed tray with individual “cells,” sow 3-4 seeds in each cell. Lettuce, spinach and other salad greens grow nicely in these seed-starting containers. At some point, if you wish, transplant them into larger pots after they’ve grown a few sets of leaves. I’ve also grown lettuce in shallow plastic window boxes indoors where a tray catches run-off water. That way I can grow many plants in one, long container.
Position the containers in a sunny window or under the lights. Once the seedlings germinate, the plastic comes off. Because soil-less mixes dry out quickly, check the pots every day. Keep the mix moist but not soggy.
Getting Started with Microgreens
There are a few key differences between micro-greens and sprouts. Sprouts are basically newly sprouted seeds. Sprouts grow in dark, moist conditions and are eaten whole — seed, root, stem and undeveloped leaves. Microgreens, on the other hand, grow in potting mix, need regular watering to keep the seeds moist, and need light once the seeds sprout, either from overhead lights or a window with bright southern or western exposure.
Choose a shallow container that will hold 1 1/2 to 2 inches of potting mix. Very little room is needed for roots. I like to grow several types of microgreens in large plant pot saucers under fluorescent lights. You can buy bulk seed packets mail-order from sources such as Johnny’s Selected Seeds (www.johnnyseeds.com) in Maine. This retailer sells a “micro mix” of spicy and colorful mustards as well as individual fast-growing seed varieties, such as Chinese cabbage and mustard. The latter are ready to harvest in about 10 to 15 days.
How to Plant Microgreens
Only purchase untreated seeds that have been produced and packaged specifically for use as sprouts or microgreens. Make certain the seeds were not treated with fungicide or other chemicals. Fill a shallow container with the growing mix and sprinkle seeds evenly over the surface. Press the seeds gently into the top layer of soil and water lightly with a spray bottle. The seeds do not need light to germinate but should be covered in a layer of soil until they sprout. Alternatively, cover them with a wet paper towel or plastic wrap. Keep the seed moist all the time so the seeds won’t dry out.
Caring for and Harvesting Microgreens
Once the seeds sprout, remove any cover, but continue to keep the soil moist. Be Patient! The greens must remain in light for the next 7 to 14 days. Empty the saucers or trays that collect any excess water. The first set of leaves are called the seed leaves or cotyledons. Wait until the stem develops 2 or 3 sets of “true” leaves. Use scissors to snip the stems above the seed leaves, otherwise the plant will not grow again and you’ll only get one cutting of greens.
Growing Leafy Salad Greens
At my house we love eating fresh lettuce all year long. During winter, we grow loose-leaf varieties (not the “head” lettuce you see in a grocery store). Some favorites include Black-seeded Simpson, Flashy Trout Back (speckled red baby leaves) and Merlot (deep red leaves). When the plants are about 4 inches tall, harvest the top 3 inches. I cut as many leaves as needed for a plate of salad. Within a few days, the plants re-grow more leaves. You can grow spinach, mesclun and arugula the same way. The plants will continue producing for three months or so. By then, hopefully it’s time to grow outdoors.
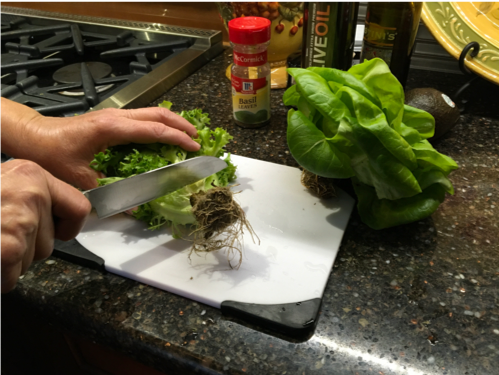
When I run out of lettuce grown indoors, I purchase “whole” heads of leaf lettuce. I remove the roots and plant them in potting mix where they’ll continue to produce leaves. Photo by Nina Koziol
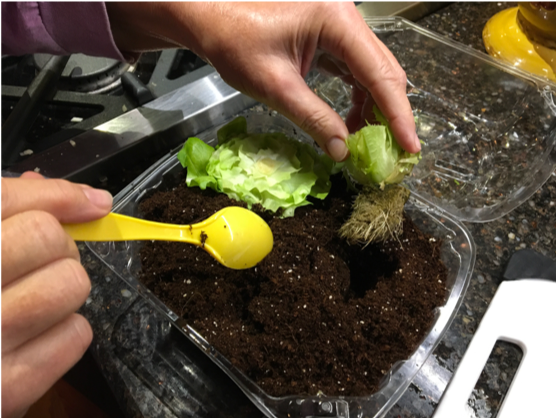
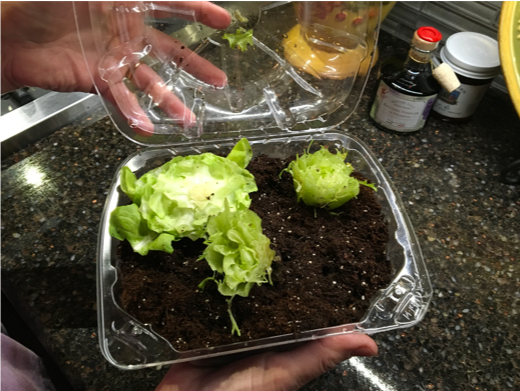
The container that held the heads of lettuce becomes a mini greenhouse for the replanted roots. Moistened soil-less potting mix gets the new lettuce plants off to a good start. The container can go near a sunny window or under fluorescent lights. Photos by Nina Koziol
Including Herbs in the Indoor Garden
If you previously used dried herbs, you’ll love having fresh leaves and stems that are grown on a windowsill or under a kitchen cabinet(fitted with a light, of course). Most herbs need 6 hours of direct sunlight or 12 to 14 hours of supplemental light.
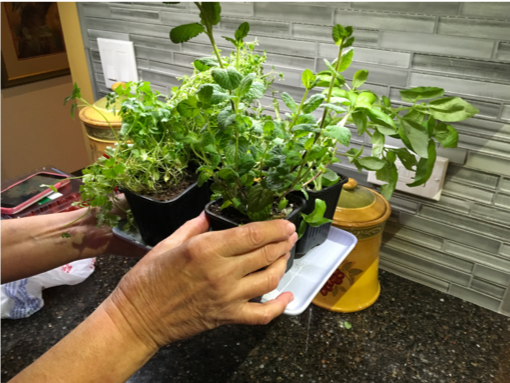
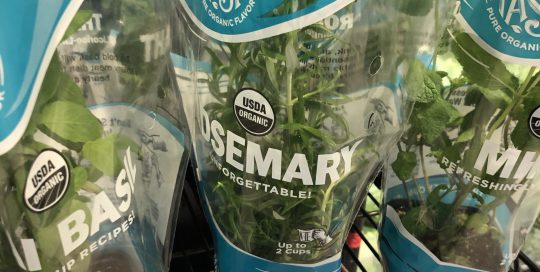
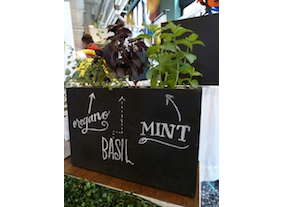
Many food stores sell pots of herbs, such as rosemary, mint and thyme, that do very well indoors. Further, you can grow basil, parsley, cilantro and chives from seed. Sow only a few seeds at a time — one seed packet goes a long way.
All herbs need good drainage. Snipping leaves and stems from the top of the plant will keep them stocky and encourages the plant to produce more stems. I group my herbs together in order to create their own little micro-climate because the indoor air can be dry in winter. Bon appétit!
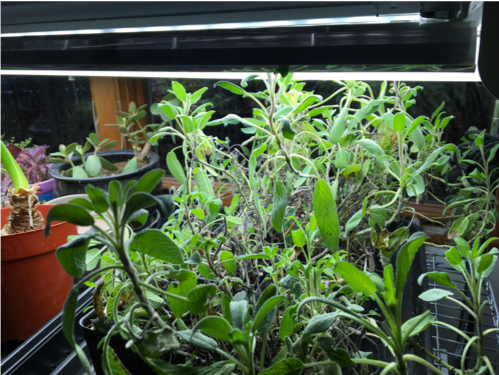
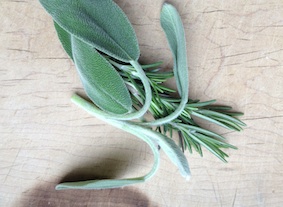
In the fall, I bring in pots of sage so I can harvest the leaves all winter. Photo by Nina Koziol
Seed Sources
Johnny’s Selected Seeds, 1-877-564-6697, www.johnnyseeds.com
Territorial Seed, 1-800-626-0866, www.territorialseed.com
John Scheepers Kitchen Garden Seeds, 1-860-567-6086, www.kitchengardenseeds.com
Renee’s Garden,1-888-880-7228, www.reneesgarden.com
Related Featured Articles
Related Videos


Related Blogs
Here’s more information about gardening that you’re going to want

Watch a Gardening Video
Learn About Osmocote Products

Read a Gardening Blog