Grow Great Garlic!
Most gardeners might be tempted to clean up their garden and stow their tools about this time of year. But if you enjoy cooking with fresh herbs and vegetables, you’ll want to plant garlic now for a harvest next summer. Garlic offers culinary versatility in the kitchen and is a staple of many ethnic dishes. I use it in soups, in stir-fries, with roasted vegetables, pork and chicken, and many other dishes. A head of roasted buttery garlic spread on fresh crusty French bread is one of our favorites (recipe below).
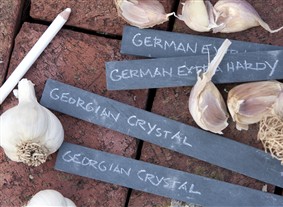
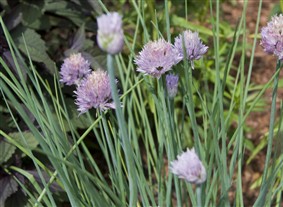
Garlic is a member of the genus Allium, which includes chives, onions, shallots and leeks. It’s an underground bulb (also called a head) made up of anywhere between 8 and 20 cloves depending on the variety. Plant the individual cloves now and each one will mature into a head of garlic by next summer. If you live in an area where the ground freezes, plant garlic at least three weeks before that happens. For average minimum temperatures in your area, visit the U.S. Department of Agriculture’s Plant Hardiness Map.
Several hundred garlic cultivars are grown in the United States, but as many as half of them are genetically identical according to a study published in the Journal of the American Society for Horticultural Science. Soil, water, location, climate and other factors can influence the flavor of each garlic bulb. Taste and color may vary, too, depending on where the garlic is grown. And, the flavor of one variety may taste different from one garden to another.
Planting
Choose a spot that receives full sun (at least six hours) from spring through summer–garlic won’t grow in shade. Plant the cloves in fertile, well-drained soil, placing them 3 to 4 inches apart and 2 to 4 inches deep. I plant them in a four-foot-square raised bed, which helps keep the soil from becoming waterlogged during heavy rains. On weeks when we don’t have adequate rainfall, I’ll keep the plants watered–don’t let the soil become too dry or the garlic heads may be small at harvest time.
I plant the smallest garlic cloves in a separate row so I can pick the leaves like green onions. We harvest one or two leaves from each of the rest of the plants in spring and use them as garlic greens or garlic “grass,” a delicate gourmet addition to many dishes, especially on salads or tossed on soup.
Hardneck vs. Softneck Garlic
Garlic generally falls into two categories: hardneck and softneck. Softneck garlic is named for its soft stem, which produces between 6 to 18 cloves in several layers. They have a long shelf life and include “silverskin” (the common kind you’d find in food stores).
Hardneck garlic (Allium sativum ssp. ophioscorodon) produces heads with 5 to 10 large cloves that grow in a single circle around a central woody stem. Their flavors range from mild to strong and spicy. They are very cold tolerant but they have a short shelf life once you harvest them.
Hardneck garlic also produces a stiff flowering stalk, called a scape, topped with bulbils (tiny bulbs) instead of seeds. The scapes are often sold at farmers’ markets in early summer. Chopped and thrown into a stir-fry dish, they are not as pungent as garlic cloves but add a hint of the flavor and aroma. We also puree the scapes for pesto and use them on pasta. I cut off the scapes when the stalks are about a foot tall in late spring.
Some growers separate hardneck garlic into additional types called rocambole, porcelain and purple stripe, Creole, Asiatic and turban, names based on the color of their papery wrappers and their flavor. Although you only get a few cloves per head with the hardnecks, the cloves tend to be a lot larger than those of softnecks.
Harvesting
After I plant the cloves this fall, they’ll send up a few leaves while they send down the first roots. The first hard freeze usually kills the young leaves but they’ll reappear about March or April. By summer, the leaves begin to turn yellow and fall over, a sign the garlic is dry and ready for harvest. In the Chicago area, harvest time is usually in July.
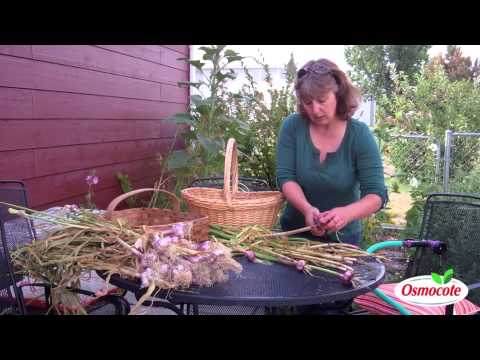
I use a spading fork to loosen the soil around the outer edge of the rows. If you try pulling the bulbs out of the ground instead of digging them out, the leaves will break off. (I’ve done that and it’s not fun.) I shake off the soil and dry the heads on newspaper before storing them. I also save some of the largest cloves for replanting again in the fall.
Storing
When garlic is first harvested, the cloves are moist and have a mild flavor. But with time, the cloves become dry, their flavor intensifies to a spicy-peppery zing, and they send up a green shoot that can be very bitter, especially when raw. When that happens, cut the cloves in half and remove the green shoot. Don’t refrigerate garlic, but do store it in a cool area where there is some air circulation. A kitchen countertop is likely a better choice than inside a cabinet or pantry.
Sources
Check your local garden centers now for garlic bulbs or order them online from seed suppliers. There’s still time to purchase and plant garlic cloves from these mail-order firms:
Burpee, 800-888-1447, www.burpee.com
Dakota Garlic, 719-510-9444, or www.dakotagarlic.com
Filaree Farm, 509-422 6940, or www.filareefarm.com
John Scheepers Kitchen Garden Seeds, 860-567-6086, or KitchenGardenSeed.com
Johnny’s Selected Seeds, 877-564-6697, or www.johnnyseeds.com
Seeds of Change Inc., 888-762-7333, or www.seedsofchange.com
Territorial Seed Co., 800-626-0866, or www.territorialseed.com
Recipes
Roasted Garlic:
If you enjoy garlic, you’ll love roasting it and spreading the buttery cloves on fresh bread. Roasting brings out a silky texture and a mellow soft taste.
2 medium-size garlic heads (bulbs)
2 teaspoons of olive oil
Aluminum foil
A loaf of fresh crusty French or Italian bread
1. Place a rack in the center of the oven and preheat to 375 degrees.
2. Slice off the very top of the garlic bulb (about 1/2 inch). You can set that aside and use that bit of raw garlic in another recipe. Place the garlic heads on a sheet of aluminum foil (cut side facing up). Drizzle a teaspoon of olive oil over each head and loosely wrap the foil over them. I use heavy duty aluminum foil. If you use a lighter weight foil, double it so the oil won’t leak in the oven.
3. Place the foil package directly on the oven rack and roast for about 45 minutes to an hour. (The aroma is heavenly.)
4. Carefully open the foil packet to let the garlic cool. Squeeze the soft cloves out of the papery skin and spread on fresh bread. You won’t need butter. Yum!
Stir-fried Bok Choy with Garlic:
1 lb. baby bok choy
2 oz vegetable oil
8 garlic cloves, peeled and sliced thin
Salt, as needed
Sugar, as needed
1. Cut the bok choy lengthwise in half. Blanch the bok choy in boiling salted water, then place in an ice bath and drain well. (This prevents the bok choy from overcooking.)
2. Heat the oil in a wok (or sauté pan), add the garlic, and stir-fry until aromatic and light brown (don’t burn the garlic or it will be bitter).
3. Add the bok choy and stir-fry to complete cooking. Add a small amount of water to the pan to keep the garlic form burning, if necessary. Season with salt and sugar. Serve warm.

