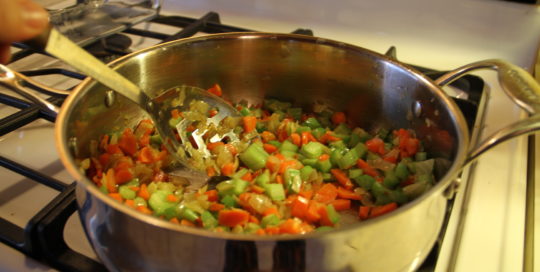
Now that the days are getting shorter and the air crisper, my thoughts are turning from the weeding and watering and staking of the past several months to cozier indoor pursuits- namely all the cooking and baking this little cottage kitchen can handle! And if you planted your vegetable garden with an autumn harvest in mind, it’s likely you’re looking for ways to incorporate your crops into meals for the chilly weeks ahead. While there are endless possibilities when it comes to preparing these popular veggies, included here are some tasty and simple methods that will take you from the garden, (or the farm stand), to the table with ease.
Pumpkin
No collection of recipes for an autumn harvest would be complete without that most quintessential symbol of fall, the pumpkin. Pumpkin is so ubiquitous these days; you really can find it in almost everything- cakes, breads, soups, lattes, donuts, and even breakfast cereals! Of course, you can pick up a can of pureed pumpkin at any grocery store, but if you’ve got a bumper crop in the backyard, where do you begin? The best pumpkins for culinary purposes tend to be the sugar pie pumpkins, or another diminutive variety. Unlike the larger jack-o-lantern pumpkins, with their watery, stringy flesh, these little guys are small, sweet, and flavorful. Excellent for baking into all those Thanksgiving pies! There are just a few steps required to take your pumpkin from seasonal tabletop decoration to delicious dish.
Pumpkin Puree:
One 4-6 pound sugar pumpkin will yield approximately two pounds pumpkin puree.
First, cut your little sugar pumpkin in half. Remove stem and scoop out seeds and stringy pulp. Seeds can be saved for roasting and snacking on later. Lay the two halves, flesh side down in a shallow baking dish and cover with foil. Bake halves at 375 degrees for 1 to 1 ½ hours or until the flesh is tender when pierced with a knife. Once the pumpkin has cooled, scoop out the flesh and puree in a food processor until smooth. The pumpkin puree can be stored in the refrigerator for up to a week, or freeze and save for three months.
Brussels Sprouts
As green vegetables go, Brussels sprouts just always seem to get a bad rap. Even the non-picky eaters in my family tend to grimace when they appear as a side dish. But prepare them the right way, (i.e. plenty of butter and garlic), and you might just forget all about the main course. In fact, add a little crispy bacon or pancetta to the mix, and these could be the main course.
Sautéed Brussels Sprouts with Garlic Butter:
- 2 lbs Brussels sprouts
- 3-4 cloves garlic, chopped
- 2-3 tablespoons olive oil
- 2 tablespoons butter
- 2 tablespoons fresh lemon juice
- Salt and pepper
Remove the stems and outer leaves of Brussels sprouts, and slice them in half lengthwise. In a large skillet, heat olive oil over medium heat. Sauté the sprouts in oil for 8-10 minutes, until tender and outside is caramelized, stirring occasionally. Add butter and chopped garlic, stirring for another 1-2 minutes. Add the lemon juice, salt, and pepper. Toss and serve. And try not to smirk as you dole out seconds.
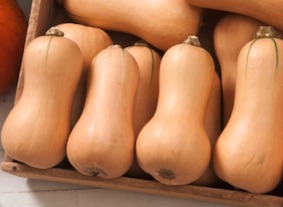
Butternut Squash
From tacos to lasagna, butternut squash pops up in a wide variety of dishes, and it is certainly up to the challenge of the spotlight. One of the classic flavors of fall, and available in abundance, the naturally sweet flesh of the butternut squash complements so many flavors and textures, it’s become one of my go-to ingredients of the season. Personally, I like a simple, no-fuss preparation best. Just the squash, a little seasoning, maybe a drizzle of maple syrup, roast and serve.
Maple Cinnamon Roasted Butternut Squashs:
- 1 butternut squash, peeled and seeded
- 2 tablespoons olive oil
- 2 tablespoons maple syrup
- ½ teaspoon salt
- ½ teaspoon cinnamon
Preheat oven to 425 degrees and line two baking sheets with foil or parchment paper. Cut squash into 1-inch cubes and spread out on baking sheets. Drizzle the squash pieces with olive oil and maple syrup. Sprinkle salt and cinnamon over the top. Toss to coat evenly. Bake approximately 30 minutes, or until squash is tender when pierced with a fork and lightly browned. Place under the broiler for a minute or two for a little extra caramelization. Enjoy!
Acorn Squash
Building on my reasonable success cooking with pumpkin and butternut squash, I took my first stab, (pun very much intended), at acorn squash last year, and haven’t looked back. These popular winter squashes are fairly small, with a deep green, ridged skin, and dark yellow flesh inside. They are tasty sliced into wedges and roasted, or flesh can be pureed and made into soups. Or cut squash in half and stuff them for a hearty and creative main course or side dish like we’ve done here.
Stuffed and Baked Acorn Squash:
- 2 acorn squash, halved and seeds removed
- 1 tablespoon olive oil
- Salt and pepper
- ½ cup cooked quinoa
- ½ onion, chopped
- 3 ribs celery, chopped
- ¼ cup dried cranberries
- ¼ cup toasted pecan pieces
- 2 tablespoons grated Parmesan
Preheat oven to 375 degrees. Slice squash in half lengthwise and scoop out seeds with a spoon. Brush flesh with olive oil and sprinkle with salt and pepper. Place the squash halves, cut side down in a baking dish lined with foil or parchment paper. Bake approximately 30 minutes, or until squash is very tender when pierced with a knife. Remove from oven, flip over cooked squash halves and set aside.
Cook quinoa according to package directions. In a skillet over medium heat, melt the butter and add celery and onions. Cook quinoa until translucent, approximately 10 minutes. Combine the veggie mixture with quinoa; add dried cranberries and pecans and season with salt and pepper. Transfer stuffing to squash halves and sprinkle Parmesan evenly over tops. Cover baking dish with foil, and bake another 15-20 minutes, until hot and bubbly.
Kale
I really might never run out of uses for kale. There’s a good chance I’d want it with me on a desert island. I sauté it, add it to smoothies, sub it into salads instead of spinach, toss it into soups and stews and pastas, you get the idea. But, hands down, my favorite thing to do with kale is turn it into chips. “Kale Chips,” you are probably thinking, sounds like an oxymoron. Some comestible Oliver Twist might have glanced at with disdain. But reader, I am here to tell you they are delicious! Crunchy, a little salty, roasted with olive oil. These chips are a fun snack to make (and eat) with kids, or all by yourself. And you definitely won’t stop at just one.
Kale Chips:
- 1 bunch kale, washed and dried
- 1-2 tablespoons olive oil
- Sea salt (to taste)
Preheat oven to 350 degrees and line a baking sheet with parchment paper. Remove kale leaves from stems, then cut or tear leaves into bite size pieces, approximately 1-1½”. Arrange kale on baking sheet and drizzle with olive oil, and then sprinkle with sea salt and any other seasonings you’d like to add. (Parmesan? Chili Powder?) Bake 10-15 minutes, until chips are crispy, and edges are browned but not burned.
Related Featured Articles
Related Videos
Related Blogs
Here’s more information about gardening that you’re going to want

Watch a Gardening Video
Learn About Osmocote Products

Read a Gardening Blog